
AI-Enabled Arduino Projects: Exploring Machine Learning
Machine learning (ML) has revolutionized numerous fields, and its integration with microcontrollers like Arduino opens up a world of possibilities. This comprehensive guide delves into the integration of AI with Arduino, providing detailed explanations, practical examples, and code snippets to help you get started.
Content
Introduction to AI and Arduino
Understanding the Synergy Between AI and Arduino
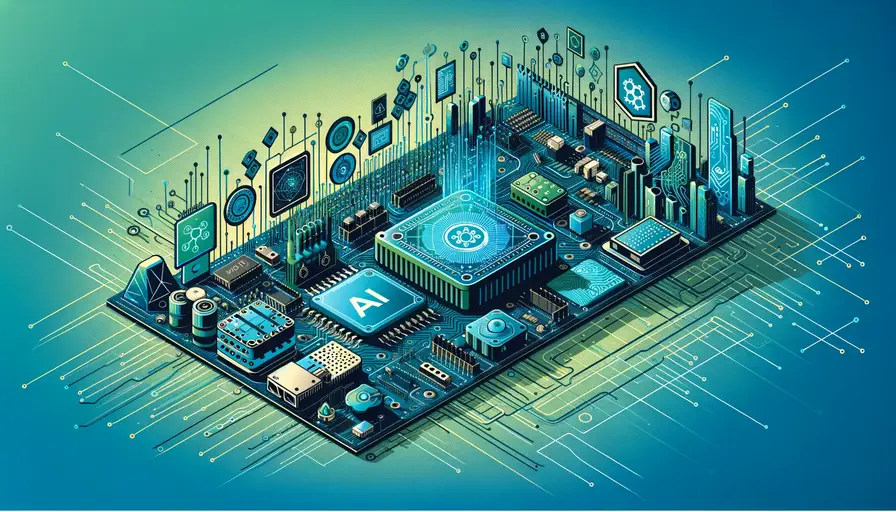
Artificial Intelligence (AI) and microcontrollers such as Arduino form a powerful combination, enabling the creation of smart systems capable of sensing, processing, and reacting to the environment. The synergy between AI algorithms and Arduino hardware can automate tasks, provide intelligent responses, and even learn from interactions.
AI algorithms bring advanced computational capabilities to Arduino, allowing it to perform complex tasks like image recognition, speech processing, and predictive analytics. Arduino, known for its versatility and ease of use, provides the hardware interface to interact with the physical world through sensors and actuators.
The integration of AI and Arduino is not just for experts. With the growing availability of pre-trained models and user-friendly libraries, even hobbyists can create intelligent projects. This democratization of technology has led to an explosion of creative applications, from home automation to robotics.
 Exploring the Integration of IoT and Machine Learning in Smart Farming
Tools and Resources for AI on Arduino
To embark on AI-enabled Arduino projects, you'll need specific tools and resources. One essential tool is the Arduino IDE, a user-friendly platform for writing and uploading code to your Arduino board. Additionally, you might use platform.io for more advanced project management.
For AI capabilities, Edge Impulse is a valuable platform that allows you to create, train, and deploy machine learning models directly on microcontrollers. Another useful resource is TensorFlow Lite, which provides a lightweight solution for running ML models on edge devices like Arduino.
Online communities and platforms such as Kaggle and Stack Overflow are excellent for finding datasets, tutorials, and troubleshooting help. These resources provide a wealth of information and support, making it easier to navigate the complexities of AI and Arduino integration.
Selecting the Right Hardware
Choosing the right hardware is crucial for the success of your AI-enabled Arduino projects. The Arduino Nano 33 BLE Sense is an excellent choice due to its built-in sensors and Bluetooth capabilities, making it suitable for a wide range of applications. Another good option is the Arduino MKR1000, which offers Wi-Fi connectivity for IoT projects.
 Revolutionizing Healthcare with Big Data and Machine Learning
Sensors play a vital role in AI projects, providing the data needed for model training and real-time inference. Common sensors include accelerometers, gyroscopes, microphones, and cameras. Ensure that the sensors you choose are compatible with your Arduino board and suitable for the specific requirements of your project.
In addition to the microcontroller and sensors, you might need actuators such as motors, servos, or LEDs to interact with the environment. These components enable your Arduino to perform actions based on the AI model's predictions, creating a truly interactive system.
Building a Voice Recognition System
Implementing Speech Recognition with Arduino
Voice recognition systems are a popular application of AI, allowing devices to understand and respond to spoken commands. Implementing speech recognition on Arduino involves several steps, from capturing audio to processing it with an AI model.
The first step is capturing audio using a microphone module connected to the Arduino. The audio data is then preprocessed to extract relevant features, such as mel-frequency cepstral coefficients (MFCCs), which are commonly used in speech recognition.
 Beyond Machine Learning: Exploring AI's Non-ML Applications
Edge Impulse can be used to train a speech recognition model. You can collect a dataset of spoken commands, train the model on this data, and then deploy it to your Arduino. The trained model can recognize predefined commands, enabling your Arduino to respond appropriately.
Code Example: Voice Command Recognition
Here is a simple code example to demonstrate voice command recognition using the Arduino Nano 33 BLE Sense:
#include <Arduino.h>
#include <PDM.h>
#include <TensorFlowLite.h>
#include <audio_provider.h>
#include <feature_provider.h>
#include <command_responder.h>
#include <recognize_commands.h>

// Set up necessary variables and configurations
void setup() {
  Serial.begin(115200);
  // Initialize PDM and other components
  if (!SetupAudio()) {
    Serial.println("Failed to set up audio");
    while (1);
  }
  // Load model and initialize features
  if (!InitializeTensorFlow()) {
    Serial.println("Failed to initialize TensorFlow");
    while (1);
  }
}

// Main loop to capture audio and process commands
void loop() {
  while (!IsAudioAvailable()) {
    delay(1);
  }
  int16_t* audio_data = GetAudioBuffer();
  ProcessAudio(audio_data);
  RecognizeCommand();
}
This example sets up the PDM library for audio capture, initializes the TensorFlow Lite model, and processes audio data to recognize commands. You can customize the RecognizeCommand function to respond to different voice commands.
Practical Applications of Voice Recognition
Voice recognition systems have numerous practical applications, from home automation to accessibility aids. In a smart home setup, you can use voice commands to control lights, appliances, and other devices, making your home more convenient and responsive.
 Machine Learning's Impact on Call Center Customer Service
In healthcare, voice recognition can assist individuals with disabilities, enabling them to control devices through spoken commands. This can significantly improve their quality of life by providing greater independence and ease of use.
Voice recognition can also be used in security systems, where spoken passwords or phrases are used to grant access. This adds an additional layer of security and convenience, as users can operate the system hands-free.
Creating an Object Detection System
Integrating Computer Vision with Arduino
Object detection is another exciting application of AI, allowing systems to identify and locate objects within an image or video stream. Integrating computer vision with Arduino involves using cameras and AI models to process visual data.
The Arduino Nano 33 BLE Sense can be combined with a camera module to capture images. The captured images are then processed using a pre-trained object detection model, such as those available in TensorFlow Lite.
 Dogs vs. Cats: Performance in Machine Learning
TinyML is a subset of machine learning focused on deploying models on resource-constrained devices like Arduino. Tools like Edge Impulse and TensorFlow Lite for Microcontrollers make it possible to run complex models on these devices, enabling real-time object detection.
Code Example: Object Detection with Arduino
Here's a basic example of how to implement object detection using the Arduino Nano 33 BLE Sense and TensorFlow Lite:
#include <Arduino.h>
#include <TensorFlowLite.h>
#include <image_provider.h>
#include <object_detection.h>

// Initialize necessary variables and configurations
void setup() {
  Serial.begin(115200);
  // Initialize camera and TensorFlow Lite model
  if (!SetupCamera()) {
    Serial.println("Failed to set up camera");
    while (1);
  }
  if (!LoadModel()) {
    Serial.println("Failed to load model");
    while (1);
  }
}

// Main loop to capture images and detect objects
void loop() {
  while (!IsCameraAvailable()) {
    delay(1);
  }
  uint8_t* image_data = GetImageBuffer();
  DetectObjects(image_data);
}
This code sets up the camera and TensorFlow Lite model, captures images, and detects objects within the images. The DetectObjects function can be customized to respond to detected objects.
Applications of Object Detection
Object detection has a wide range of applications, from security and surveillance to robotics and automation. In security systems, object detection can identify intruders or unauthorized items, triggering alerts or actions to enhance security.
 Deep Learning AI's Impact on Art History in Museums
In robotics, object detection enables robots to navigate environments, avoid obstacles, and interact with objects. This is essential for tasks such as sorting, picking, and assembly in manufacturing and logistics.
Object detection is also used in autonomous vehicles, where it helps in identifying road signs, pedestrians, and other vehicles. This capability is crucial for ensuring the safety and efficiency of self-driving cars.
Developing a Predictive Maintenance System
Utilizing Predictive Analytics with Arduino
Predictive maintenance systems use machine learning to predict equipment failures before they occur, enabling proactive maintenance and reducing downtime. Implementing such systems with Arduino involves collecting sensor data, training predictive models, and making real-time predictions.
Vibration sensors, temperature sensors, and current sensors are commonly used to monitor the health of machinery. The data from these sensors is processed using ML models that identify patterns indicative of impending failures.
Tools like Edge Impulse can be used to train predictive models on historical data. Once trained, these models can be deployed on Arduino to continuously monitor equipment and predict failures, enabling timely maintenance actions.
Code Example: Predictive Maintenance with Arduino
Here is an example code snippet for implementing predictive maintenance using Arduino Nano 33 BLE Sense:
#include <Arduino.h>
#include <TensorFlowLite.h>
#include <sensor_provider.h>
#include <predictive_model.h>

// Set up necessary variables and configurations
void setup() {
  Serial.begin(115200);
  // Initialize sensors and TensorFlow Lite model
  if (!InitializeSensors()) {
    Serial.println("Failed to initialize sensors");
    while (1);
  }
  if (!LoadPredictiveModel()) {
    Serial.println("Failed to load model");
    while (1);
  }
}

// Main loop to capture sensor data and make predictions
void loop() {
  while (!IsSensorDataAvailable()) {
    delay(1);
  }
  float* sensor_data = GetSensorData();
  PredictMaintenance(sensor_data);
}
This code initializes the sensors and TensorFlow Lite model, captures sensor data, and makes maintenance predictions using the PredictMaintenance function. This function can be customized to trigger alerts or actions based on the predictions.
Benefits and Applications of Predictive Maintenance
Predictive maintenance offers several benefits, including reduced downtime, lower maintenance costs, and increased equipment lifespan. By predicting failures before they occur, maintenance can be scheduled at convenient times, avoiding unexpected breakdowns and production delays.
In manufacturing, predictive maintenance ensures that machinery operates efficiently, reducing the risk of costly failures. This leads to higher productivity and improved product quality, as equipment is kept in optimal condition.
Predictive maintenance is also valuable in critical infrastructure, such as power plants and transportation systems. By preventing failures in these systems, it ensures safety and reliability, protecting both people and assets.
Implementing Gesture Recognition
Exploring Gesture-Based Interaction with Arduino
Gesture recognition systems enable devices to interpret and respond to human gestures, providing a natural and intuitive interface. Implementing gesture recognition with Arduino involves using sensors to capture gesture data and AI models to interpret it.
The Arduino Nano 33 BLE Sense with its built-in accelerometer and gyroscope is well-suited for gesture recognition. These sensors capture movement data, which can be processed to recognize specific gestures.
Edge Impulse can be used to train gesture recognition models. By collecting data for various gestures, training a model, and deploying it to your Arduino, you can create a system that responds to gestures in real-time.
Code Example: Gesture Recognition with Arduino
Here is an example of how to implement gesture recognition using the Arduino Nano 33 BLE Sense:
#include <Arduino.h>
#include <TensorFlowLite.h>
#include <motion_provider.h>
#include <gesture_recognition.h>

// Initialize necessary variables and configurations
void setup() {
  Serial.begin(115200);
  // Initialize motion sensors and TensorFlow Lite model
  if (!InitializeMotionSensors()) {
    Serial.println("Failed to initialize motion sensors");
    while (1);
  }
  if (!LoadGestureModel()) {
    Serial.println("Failed to load model");
    while (1);
  }
}

// Main loop to capture motion data and recognize gestures
void loop() {
  while (!IsMotionDataAvailable()) {
    delay(1);
  }
  float* motion_data = GetMotionData();
  RecognizeGesture(motion_data);
}
This code sets up the motion sensors and TensorFlow Lite model, captures motion data, and recognizes gestures using the RecognizeGesture function. You can customize this function to perform specific actions based on recognized gestures.
Applications of Gesture Recognition
Gesture recognition has numerous applications, from gaming and entertainment to healthcare and assistive technology. In gaming, gesture recognition can provide an immersive experience, allowing players to interact with games through natural movements.
In healthcare, gesture recognition can assist patients with mobility impairments, enabling them to control devices with simple gestures. This can improve their quality of life by providing greater independence and ease of use.
Gesture recognition is also used in smart home systems, where it allows users to control lights, appliances, and other devices with hand gestures. This provides a convenient and touch-free interface, enhancing the user experience.
Designing a Smart Home Automation System
Creating Intelligent Home Automation with Arduino
Smart home automation systems use machine learning to provide intelligent control over home devices, enhancing convenience, security, and energy efficiency. Implementing these systems with Arduino involves integrating various sensors and actuators, and using AI models to automate tasks.
Sensors such as motion detectors, light sensors, and temperature sensors provide data about the home environment. Actuators like relays, servos, and smart plugs control devices based on AI model predictions.
Home Assistant and OpenHAB are platforms that can be integrated with Arduino to create comprehensive smart home solutions. These platforms provide a user-friendly interface to configure and control devices, and can be enhanced with AI models for automation.
Code Example: Smart Home Automation with Arduino
Here is an example code snippet for a simple smart home automation system using Arduino Uno and a relay module:
#include <Arduino.h>
#include <DHT.h>

#define DHTPIN 2
#define DHTTYPE DHT22
#define RELAY_PIN 3

DHT dht(DHTPIN, DHTTYPE);

// Initialize necessary variables and configurations
void setup() {
  Serial.begin(115200);
  dht.begin();
  pinMode(RELAY_PIN, OUTPUT);
  digitalWrite(RELAY_PIN, LOW);
}

// Main loop to monitor environment and control devices
void loop() {
  float temperature = dht.readTemperature();
  float humidity = dht.readHumidity();

  if (isnan(temperature) || isnan(humidity)) {
    Serial.println("Failed to read from DHT sensor!");
    return;
  }

  if (temperature > 25.0) {
    digitalWrite(RELAY_PIN, HIGH);
  } else {
    digitalWrite(RELAY_PIN, LOW);
  }

  delay(2000);
}
This code reads temperature and humidity from a DHT22 sensor and controls a relay based on the temperature. You can extend this example by adding more sensors and actuators, and incorporating AI models for intelligent control.
Benefits and Applications of Smart Home Automation
Smart home automation offers numerous benefits, including increased convenience, enhanced security, and improved energy efficiency. By automating routine tasks, smart home systems save time and effort, making daily life more convenient.
In terms of security, smart home systems can monitor for intrusions, detect smoke or gas leaks, and provide real-time alerts. This enhances the safety of the home, providing peace of mind for residents.
Smart home automation also contributes to energy efficiency by optimizing the use of lighting, heating, and cooling systems. AI models can learn usage patterns and adjust settings to reduce energy consumption, leading to cost savings and environmental benefits.
Implementing a Personal Health Monitoring System
Leveraging AI for Health Monitoring with Arduino
Personal health monitoring systems use machine learning to track and analyze health data, providing insights into physical well-being and enabling early detection of potential issues. Implementing these systems with Arduino involves using sensors to collect health data and AI models to interpret it.
Heart rate monitors, ECG sensors, and temperature sensors are commonly used in health monitoring systems. The data from these sensors is processed using ML models to detect abnormalities or trends that may indicate health issues.
Edge Impulse can be used to train health monitoring models on collected data. Once trained, these models can be deployed on Arduino to provide real-time health monitoring and alerts, helping individuals manage their health more effectively.
Code Example: Health Monitoring with Arduino
Here is an example code snippet for implementing a heart rate monitoring system using Arduino Uno and a pulse sensor:
#include <Arduino.h>

#define PULSE_PIN A0
#define THRESHOLD 550

// Initialize necessary variables and configurations
void setup() {
  Serial.begin(115200);
  pinMode(PULSE_PIN, INPUT);
}

// Main loop to monitor heart rate
void loop() {
  int pulseValue = analogRead(PULSE_PIN);

  if (pulseValue > THRESHOLD) {
    Serial.println("Heartbeat detected!");
  }

  delay(10);
}
This code reads the pulse value from a pulse sensor and detects heartbeats based on a threshold value. You can enhance this example by adding more sensors and integrating AI models to analyze the health data.
Benefits and Applications of Health Monitoring
Health monitoring systems offer several benefits, including continuous health tracking, early detection of health issues, and personalized health insights. By providing real-time monitoring, these systems enable individuals to manage their health proactively.
In healthcare, health monitoring systems can be used to remotely monitor patients, providing doctors with continuous data and enabling timely interventions. This improves patient care and reduces the need for frequent hospital visits.
Health monitoring systems are also valuable for fitness enthusiasts, providing insights into physical activity and helping to optimize workout routines. By tracking metrics such as heart rate, steps, and calories burned, these systems support a healthier lifestyle.
The integration of AI with Arduino opens up endless possibilities for creating intelligent systems that can sense, process, and interact with the environment. Whether you're interested in voice recognition, object detection, predictive maintenance, gesture recognition, smart home automation, or health monitoring, the combination of machine learning and Arduino offers a powerful platform for innovation. By leveraging the tools, resources, and examples provided in this guide, you can start building your own AI-enabled Arduino projects and explore the exciting potential of this technology.
If you want to read more articles similar to AI-Enabled Arduino Projects: Exploring Machine Learning, you can visit the Applications category.
Exploring the Potential of Machine Learning in R: Can It Be Done?

Machine Learning Projects with Recommendation Engines

Top Python-Based Machine Learning Projects to Explore

Optimizing Supply Chain Operations with Machine Learning

Exploring the Depths of Machine Learning: Beyond Linear Regression

Can Machine Learning Unlock the Secrets of Quantum Theory?
You Must Read